Autor
Autor


Fail2Ban es una herramienta utilizada para bloquear direcciones IP sospechosas cuando éstas envían múltiples solicitudes a un servidor específico. Esta herramienta escanea el archivo de registros y bloquea las direcciones IP que realizan tareas repetitivas contra una misma dirección, actualizando la política de firewall del usuario para negar nuevas conexiones de direcciones IP potencialmente maliciosas.
Kali Linux 192.168.1.9
Ubuntu 192.168.1.8
Aquí ejecutaremos un ataque DOS usando Slowloris, una herramienta muy comúnmente utilizada en esta clase de ataques
Abra terminal en su máquina Ubuntu (del lado del atacante)
Escriba sudo apt-get update
Escriba sudo apt-get install python3
Escriba sudo apt-get install python3-pip
Escriba pip3 version
Código:
1 root@ubuntu:/home/iicybersecurity# pip3 --version
2 pip 9.0.1 from /usr/lib/python3/dist-packages (python 3.6)
Escriba pip3 install Slowloris
Código:
root@ubuntu:/home/iicybersecurity# pip3 install slowloris
Collecting slowloris
Downloading https://files.pythonhosted.org/packages/a6/37/5ae3d027727122039f52a22d278f1d73f564e03e5fdb93f10e3a2f26aa06/Slowloris-0.2.0.tar.gz
Building wheels for collected packages: slowloris
Running setup.py bdist_wheel for slowloris done
Stored in directory: /root/.cache/pip/wheels/bd/a1/f1/35dd5184db4e890b6ff5c992ff1f7a1b8b30e9bcd89aa6f7ba
Successfully built slowloris
Installing collected packages: slowloris
Successfully installed slowloris-0.2.0
Escriba slowloris help
Código:
root@ubuntu:/home/iicybersecurity# slowloris --help
 usage: slowloris [-h] [-p PORT] [-s SOCKETS] [-v] [-ua] [-x]
                  [--proxy-host PROXY_HOST] [--proxy-port PROXY_PORT] [--https]
                  [--sleeptime SLEEPTIME]
                  [host]
 Slowloris, low bandwidth stress test tool for websites
 positional arguments:
   host                  Host to perform stress test on
 optional arguments:
   -h, --help            show this help message and exit
   -p PORT, --port PORT  Port of webserver, usually 80
   -s SOCKETS, --sockets SOCKETS
                         Number of sockets to use in the test
   -v, --verbose         Increases logging
   -ua, --randuseragents
                         Randomizes user-agents with each request
   -x, --useproxy        Use a SOCKS5 proxy for connecting
   --proxy-host PROXY_HOST
                         SOCKS5 proxy host
   --proxy-port PROXY_PORT
                         SOCKS5 proxy port
   --https               Use HTTPS for the requests
   --sleeptime SLEEPTIME
                         Time to sleep between each header sent.
Escriba slowloris 192.168.1.9; este comando iniciará dos ataques normales contra la máquina víctima (máquina Kali)
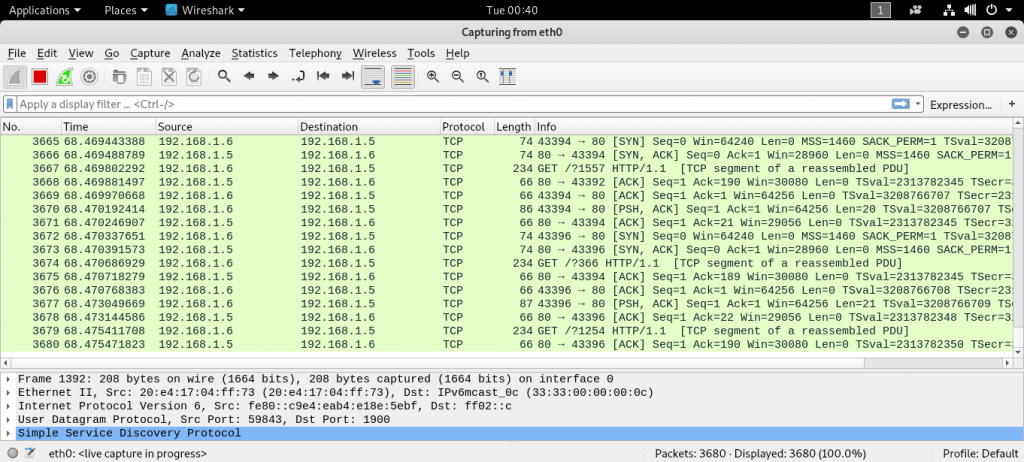
Captura de pantalla de Wireshark en la máquina de la vícitma 192.168.1.9
La captura de pantalla anterior de Wireshark muestra la recepción de los paquetes TCP mientras la víctima ejecuta el servicio apache2. Por defecto, Slowloris envía múltiples paquetes de datos en el puerto 80
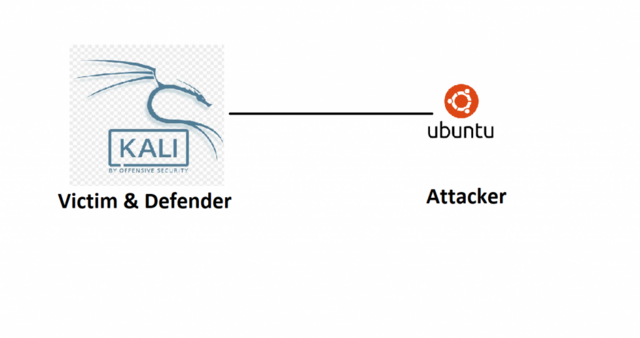
Arriba se muestra un escenario muy simple de cómo se despliega un ataque DoS. Utilizaremos Fail2Ban como defensa contra estos ataques
Máquina de la víctima (Con sistema operativo Kali Linux)
Instalación de Fail2Ban
Vamos a realizar las pruebas en distintas distribuciones de Linux. Al atacar usaremos Ubuntu 18.04 y para defender usaremos Kali Linux en:
Kali Linux (víctima/defensor) 192.168.1.9
Ubuntu (atacante) 192.168.1.8
Para instalación en Kali Linux, abra el terminal
Escriba sudo apt-get update
Escriba sudo apt-get install fail2ban
Escriba sudo service apache2 start
Escriba sudo systemctl status apache2
Código:
root@kali:/etc/fail2ban# sudo systemctl status apache2
 ● apache2.service - The Apache HTTP Server
    Loaded: loaded (/lib/systemd/system/apache2.service; disabled; vendor preset: disabled)
    Active: active (running) since Tue 2019-11-05 02:09:37 EST; 2h 47min ago
   Process: 4749 ExecStart=/usr/sbin/apachectl start (code=exited, status=0/SUCCESS)
  Main PID: 4753 (/usr/sbin/apach)
     Tasks: 152 (limit: 4662)
    Memory: 91.3M
    CGroup: /system.slice/apache2.service
            ├─4753 /usr/sbin/apache2 -k start
            ├─4754 /usr/sbin/apache2 -k start
            ├─6073 /usr/sbin/apache2 -k start
            ├─6074 /usr/sbin/apache2 -k start
            ├─6075 /usr/sbin/apache2 -k start
            ├─6077 /usr/sbin/apache2 -k start
            ├─6079 /usr/sbin/apache2 -k start
            ├─6080 /usr/sbin/apache2 -k start
            ├─6081 /usr/sbin/apache2 -k start
            ├─6083 /usr/sbin/apache2 -k start
            ├─6084 /usr/sbin/apache2 -k start
            ├─6085 /usr/sbin/apache2 -k start
            ├─6086 /usr/sbin/apache2 -k start
            ├─6087 /usr/sbin/apache2 -k start
            ├─6088 /usr/sbin/apache2 -k start
            ├─6089 /usr/sbin/apache2 -k start
            ├─6090 /usr/sbin/apache2 -k start
            ├─6091 /usr/sbin/apache2 -k start
            ├─6092 /usr/sbin/apache2 -k start
            ├─6093 /usr/sbin/apache2 -k start
            ├─6094 /usr/sbin/apache2 -k start
Presione Ctrl+c
Antes de iniciar el servicio de Fail2Ban tenemos que configurarlo. Para eso:
Escriba cd/etc/fail2ban
Escriba nano jail.conf
Aquí cambie:
bantime = 30
findtime = 50
maxretry = 10
Luego ingrese enabled = true después de [apache-auth], [apache-badbots], [apache-noscript] y [apache-overflows] como se muestra a continuación:
Código:
ignorecommand = /path/to/command
 ignorecommand =
 "bantime" is the number of seconds that a host is banned.
 bantime  = 30
 A host is banned if it has generated "maxretry" during the last "findtime"
 seconds.
 findtime  = 50
 "maxretry" is the number of failures before a host get banned.
 maxretry = 10

HTTP servers
 #
 [apache-auth]
 enabled  = true
 port     = http,https
 logpath  = %(apache_error_log)s

 [apache-badbots]
 Ban hosts which agent identifies spammer robots crawling the web
 for email addresses. The mail outputs are buffered.
 enabled  = true
 port     = http,https
 logpath  = %(apache_access_log)s
 bantime  = 48h
 maxretry = 1

[apache-noscript]
 enabled  = true
 port     = http,https
 logpath  = %(apache_error_log)s

 [apache-overflows]
 enabled  = true
 port     = http,https
 logpath  = %(apache_error_log)s
 maxretry = 2
Escriba sudo nano /etc/fail2ban/jail.local y copie el texto mostrado a continuación. También puede cambiar maxretry, findtime en la sección [apache]
Código:
[apache]
enabled  = true
port     = http,https
filter   = apache-auth
logpath  = /var/log/apache2/*error.log
maxretry = 2
findtime = 50
ignoreip =
Escriba sudo /etc/init.d/fail2ban start
Código:
root@kali:/etc/fail2ban# sudo /etc/init.d/fail2ban start
 [ ok ] Starting fail2ban (via systemctl): fail2ban.service.
 root@kali:/etc/fail2ban#
Guarde el archivo y escriba sudo systemctl status fail2ban.service
Código:
root@kali:/etc/fail2ban# sudo systemctl status fail2ban.service
● fail2ban.service - Fail2Ban Service
Loaded: loaded (/lib/systemd/system/fail2ban.service; disabled; vendor preset: disabled)
Active: active (running) since Tue 2019-11-05 05:02:20 EST; 3s ago
Docs: man:fail2ban(1)
Process: 6475 ExecStartPre=/bin/mkdir -p /var/run/fail2ban (code=exited, status=0/SUCCESS)
Main PID: 6476 (fail2ban-server)
Tasks: 13 (limit: 4662)
Memory: 17.9M
CGroup: /system.slice/fail2ban.service
└─6476 /usr/bin/python3 /usr/bin/fail2ban-server -xf start
Nov 05 05:02:20 kali systemd[1]: Starting Fail2Ban Service
Nov 05 05:02:20 kali systemd[1]: Started Fail2Ban Service.
Nov 05 05:02:21 kali fail2ban-server[6476]: Server ready
Máquina del atacante (Con sistema operativo Ubuntu)
Escriba slowloris 192.168.1.9 -p 80; el programa comenzará a enviar los paquetes a la IP seleccionada para el ataque
192.168.1.9 es la IP objetivo
-p se usa para indicar el número de puerto. Usar el puerto 80 genera el tráfico.
Código:
root@ubuntu:/home/iicybersecurity# slowloris 192.168.1.9 -p 80
[05-11-2019 02:08:59] Attacking 192.168.1.9 with 150 sockets.
[05-11-2019 02:08:59] Creating sockets
[05-11-2019 02:08:59] Sending keep-alive headers Socket count: 150
[05-11-2019 02:09:14] Sending keep-alive headers Socket count: 150
[05-11-2019 02:09:29] Sending keep-alive headers Socket count: 150
[05-11-2019 02:09:44] Sending keep-alive headers Socket count: 150
[05-11-2019 02:09:59] Sending keep-alive headers Socket count: 150
[05-11-2019 02:10:14] Sending keep-alive headers Socket count: 150
[05-11-2019 02:10:29] Sending keep-alive headers Socket count: 150
[05-11-2019 02:10:44] Sending keep-alive headers Socket count: 150
[05-11-2019 02:11:00] Sending keep-alive headers Socket count: 150
[05-11-2019 02:11:15] Sending keep-alive headers Socket count: 150
[05-11-2019 02:11:30] Sending keep-alive headers Socket count: 150
[05-11-2019 02:11:45] Sending keep-alive headers Socket count: 150
[05-11-2019 02:12:00] Sending keep-alive headers Socket count: 150
[05-11-2019 02:12:15] Sending keep-alive headers Socket count: 150
[05-11-2019 02:12:30] Sending keep-alive headers Socket count: 150
Máquina de la víctima
Ahora vaya a la máquina víctima con sistema operativo Kali Linux. En Wireshark, se aprecia el ataque DoS desde la máquina atacante a la dirección IP de destino, mencionan los expertos en hacking ético
Escriba sudo fail2ban-client set apache banip 192.168.1.8
Este comando bloqueará la dirección IP de destino. La captura de pantalla siguiente muestra que 192.168.1.8 ha sido bloqueada
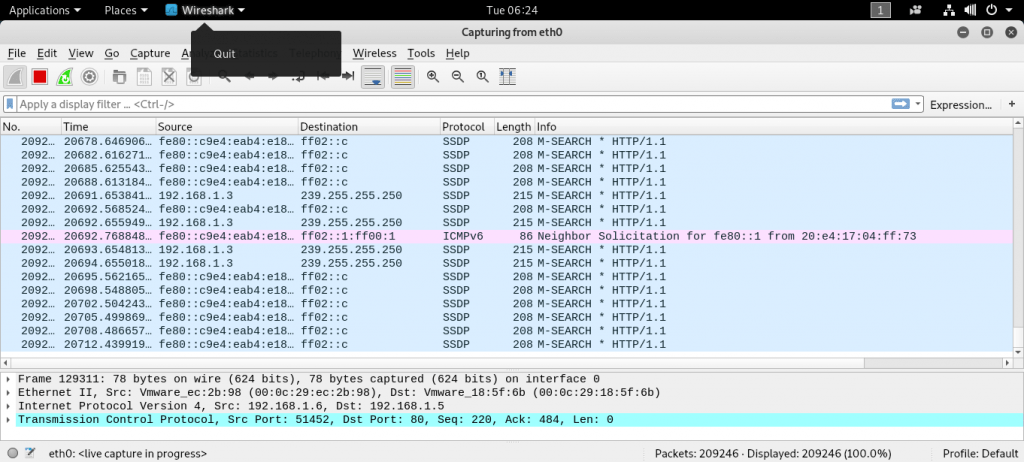
Acorde a los expertos en hacking ético, la captura de pantalla anterior muestra que ninguno de los paquetes está siendo recibido
Ahora, si verifica el estado de Fail2Ban notará que la IP del atacante ha sido bloqueada
Para verificar el estado, abra otro terminal y escriba sudo fail2ban-client status apache.
Código:
root@kali:/var/log/apache2# sudo fail2ban-client status apache
 Status for the jail: apache
 |- Filter
 |  |- Currently failed: 0
 |  |- Total failed:     1
 |  - File list:        /var/log/apache2/error.log - Actions
    |- Currently banned: 1
    |- Total banned:     1
    `- Banned IP list:   192.168.1.8
Arriba se muestra como bloqueado el estado de la máquina atacante (Ubuntu) 192.168.1.8, mencionan los expertos en hacking ético.
 En línea